Tuesday, March 31, 2015

How to keep the DERRIÈRE & Back-side Smooth as Silk


BEAUTY TIP: 
The skin should be nurtured and cared for from HEAD to TOE...and that includes the derrière & backside. The lower back is vulnerable to Keratosis Polaris (bumpy chicken skin), which can easily be treated with the use of a Glycolic (AHA) body wash. The buttocks is vulnerable to Folliculitis (acne-type lesions on the skin) which can be managed by using a Benzaderm Wash with 10% Benzoyl Peroxide. A woman's backside is one of her most alluring features, so make sure that you're NOT neglecting yours. 

For daily beauty tips, follow me 
@Beauty and Brow Girl

CIAO for now xoxo


Monday, March 30, 2015

Choose a POP of Color & Create a Color Story


COLOR STORY: Tangerine is my spring dream... 😍 Chose a POP of color and create a fresh look by applying it to the eyes, lips and cheeks (I actually used the same pigment on my eyes AND cheeks). A color story that stays within similar tones is always a sure bet for a cohesive look.

Thursday, March 26, 2015

ORANGE Pigment Corrects Skin Discoloration


BEAUTY TIP: Can you tell that my skin is loaded with MELASMA and HYPER-PIGMENTATION?  The reason that you can't spot my SPOTS --SANS EDITING-- is because of my TANGERINE DREAM! Dark spots and circles need to be cancelled-out with an opposing color (as per the color wheel). Skin discoloration is typically blue based, therefore, for those blessed with blue or purple skin-tone variations, ORANGE is the new happy! My trick? I take a generous amount of Tangerine eyeshadow and mix it with my concealer, for a custom-blended corrector. Don't view makeup at face value, it's all simply just PIGMENT (orange lipstick works as well). After I blend the "orange concealer" into my moisturized skin, I apply a light layer of foundation, and then regular concealer as usual. The orange layer underneath negates the blue, and you're left with clear luminous skin. It's not magic, it's not rocket science, it's simply a matter of color theory.

For daily beauty tips follow me
@Beauty and Brow Girl
Twitter: @Beauty n Brow Girl

xoxo Ciao for now.....

Tuesday, March 24, 2015

Not All Make-up Removers are the Same

The key to amazing skin is a GENTLE and CONSISTENT ritual which includes the thorough REMOVAL of make-up each night, before bed. One's make-up remover should NOT be an afterthought, as this product is essential in the perpetual care of the skin surrounding the eyes. Look for a make-up remover that is oil-free and water based, such as a "silicone surfactant". Silicone-based removers are amazing at gently dissolving oils and makeup from the eye area. When left to settle, the content of the bottle resembles oil and water, but don't be fooled. Silicones are not oils, they are non-toxic and inert, and will not clog pores. I am NOT a fan of oil-based over-the-counter removers, cream removers or make-up removal WIPES for two reasons: 1. The ingredients are harsh on the skin (and eyes), and 2. The actual material of the wipe isn't gentle at all, but rather irritating to the skin. Wipes are great in a pinch, but do NOT get into the habit of using them on a daily basis. You should only be using COTTON around the eyes. The eye-skin is the THINNEST and most delicate skin on the body. It's void of hair follicles (which means that no oils are being produced) and it is the FIRST area to show signs of aging. Treating the eyes with a delicate touch, starting with your make-up remover, is a good habit to start. What product is my fave? "MARY KAY" has an amazing silicone-based formula, like no other I've seen, that does the trick amazingly well...I buy it by the boat load. 

Wednesday, November 26, 2014

COLD creams


     When I think of the benefits of what cold does to the skin, I flashback to the opening scene of Mommy Dearest where Faye Dunaway's character pulls out a big bowl of ice water from the mini fridge (conveniently stored in her bathroom), and drowns her face in the icy liquid.  As a child I used to witness my Middle Eastern aunts slather their faces with a thick white layer of the Ponds Cold Cream that they stored in the refrigerator. At the time I never understood why they didn't just reserve the fridge for produce, but the fact that they always looked at least 20 years younger than their age, tells me that they were onto something. 

    This notion of the skin benefiting from cold products has stuck with me all these years since watching that movie scene and my aunt's refrigerated cream, and now that I'm a skin care professional I understand why:

KEEP THE EYES COLD:
     If you've ever had a professional facial, you will know that the eyes are always kept cool, despite warmth and steam manipulation applied to the face. With regard to make-up, pigments work best when warmed by the body's heat (my favorite trick is to use a lighter to warm my kohl eyeliner prior to application, it glides on better and cools to a semi-permanent finish). However, when PREPPING the skin for make up application (particularly the eyes), applying something cold to the skin will reduce inflammation and give your skin a sense of vigor. Applying coolness to the face restricts the blood vessels and causes the skin (and pores) to tighten. Cold stimulates the nerves and energizes the skin which is pretty important on those early-morning wake-up calls. Objects (like an ice-pack), or products applied to puffy eyes, work in reducing inflammation in the same way that water eliminates a flame. The immediate shock from warm to cold allows fluid stored in the eye ducts to drain and de-puff. 

THE REFRIGERATOR IS A MUST-HAVE BEAUTY TOOL:
     A trick that I've been doing for years is to keep two kitchen spoons in my freezer and press them firmly onto my eyes for about 5 minutes. This trick is great when I need a quick fix to combat puffy morning eyes. Another weapon for inflammation around the eyes (thank you aunties) is to saturate green tea bags in water and freeze them. Resting the frozen tea bags on your eyelids as the green tea thaws onto the eye skin is an eye de-puffing marvel! Green tea has anti-inflammatory properties and soothes the skin, how fabulous is that!

     Beauty products can also benefit from your fridge. Facial serums, face creams and eye creams, for example, have a shelf life and should be kept in cool, dark environments. Notice the container that your cream or serum comes in. If the bottle or jar is amber in color or if you cannot see the product through the bottle, it usually means that it's photo sensitive, such as products containing vitamin C. Keeping serums and creams in the fridge serve multiple functions: it preserves the shelf life of the product, it ensures that the chemical composition of your products are not altered by heat and humidity, and it adds the benefit of coolness to the skin and eyes. 

COLD HAIR
     Rinsing the hair with cold water after a hot shower will seal the hair cuticle, this helps hair with the shine factor. Have you ever noticed how hair is shinier in frigid cold weather? It's for this reason that I like to keep my silicone based hair serums and keratin creams in the refrigerator. When applied to dry hair, these chilled hair products will give you a that uber shine factor.

MORE BENEFITS OF COLD
     Exposure to cold will stimulate the Nervous System and increase the level of Beta-Endorphins and Noradrenaline in the blood. Beta-Endorphins are the neurotransmitters responsible for making us feel happy and invigorated; their function is similar to adrenaline whereby constricting the blood vessels and normalizing breathing during stressful situations. Noradrenaline deficiency can lead to fatigue, lethargy and a feeling of overall tiredness, so stay cold for more happy!

ATTENTION MEN                         
Can cold increase a man's testosterone levels? Indeed it can (whooo hoooo!). One way is to apply cold compresses to the gonads twice a day, but an easier way is to take a 10 minute cold shower upon waking-up in the morning and then before bed. The cold water will not only boost a man’s libido, but his overall strength; his energy levels will increase as well. A man's gonads physically change as a direct result of temperature. When it's hot, they hang lower in order to escape the heat in an effort to cool down; when it's cold, the sack rises. Heat is a real testosterone killer, so before you warm up the sheets, cool down in the shower first. So, what does a man's testosterone level have to do with the theme of "female beauty" in this article, you may ask? Simply put, a woman's healthy, rosy, gorgeous glow will benefit immensely and can be a direct result of her partner's testosterone levels. So, keep your man cold (below the belt) whenever possible ;)
--CIAO for now xo

For DAILY beauty tips, follow me on Instagram, Facebook and Tumbler: @Beauty and Brow Girl
.....Twitter: @BeautynBrowGirl

Saturday, October 4, 2014

Fill-in those BROWS! 101


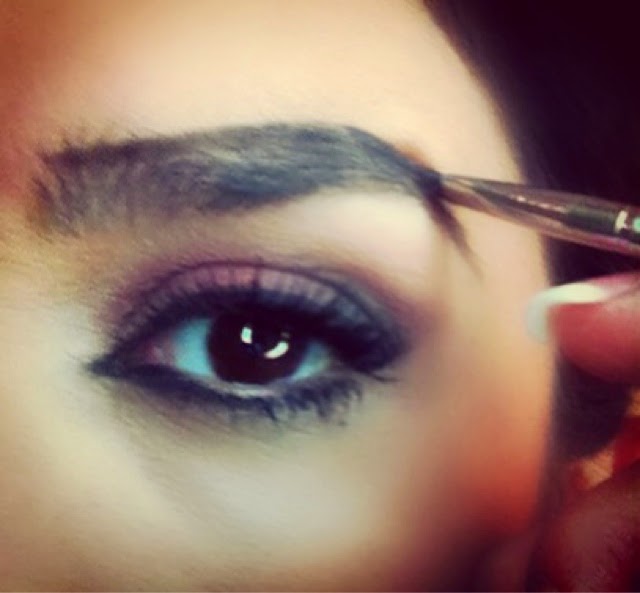
The eyebrows are the quintessential pillars of the face, framing the features like nothing else can. They balance the face, adding impact, strength, symmetry and intense visual interest, while creating a bit of mystery. Even the fullest of brows require help with sparse gaps which create imbalance. Whether using a brow pencil, a pigment cream, a pigment gel or a pigment powder (my preferred method and the method used below), the same rules apply: use a light touch when applying, and blend blend blend to achieve a soft yet bold finish.

BROW ANATOMY: The eyebrows are comprised of four quadrants. The hairs of the top line of the brows grow downward. The bottom brow-line hairs grow up. If you brush the brows down, exposing the top line of the eyebrow, notice the portion from the head to the top of the arch (quadrant "q" 1), and the line from top of arch to the upper tip of the tail ("q 2"). Now brush the brow hairs upward. Start at the underside of the head to the underside of the curve to identify "q 3", then continue the line from underside of arch to underside of tail ("q 4"). When you identify the four quadrants and trace those lines with pigment (regardless of how sparse and thin your brows are), you've just identified your brow's unique anatomy by creating a blueprint.

Invest in a quality eyebrow brush and practice shading your brows-in everyday. A shaded brow adds life to the face, so take the time to learn how to fill yours in. 

STEP 1: Brush the hairs upward


STEP 2: Tweeze away any stray hairs (never wax the brows).


STEP 3: Apply a brow pigment (with an eyebrow brush) to Quadrant-1 and follow the top line from HEAD to ARCH. If using a brow powder, I recommend wetting the brush first with a bit of water, then dip your damp brush into the powder pigment.


STEP 4: Follow the top brow line from Quadrant-2, from ARCH to TAIL. 


STEP 5: Now outline and follow the under-side line of Quadrant-3, from under-side of head to the under side of the arch. 


STEP 6: Continue that bottom brow-line from the under-arch to the under side of the tail (Quadrant-4). 


STEP 7: Using a spoolie, brush your brows to blend-in the pigment. Brush in the opposite direction of the hair growth to really blend the pigment into the underlying skin.


STEP 8: After the pigment is well blended, fine tune the sparse areas that may need a bit more pigmentation.


STEP 9: Applying a creamy concealer to the perimeter of the eyebrows will hide any discoloration and hyper-pigmentation around the eyebrows, making them really stand-out. Then blend the concealer well with a concealer brush.


STEP 10: Brush on a sheer layer of light eye shadow onto the brow bone. The shadow will finish the look and really set the brows off making them the star of the face show!


For daily beauty, skin-care and BROW tips, follow me on Instagram, Facebook and Tumbler 
@Beauty and Brow Girl  or on Twitter @Beauty n Brow Girl
Direct links from my website at www.BeautyandBrowLounge.com

--CIAO for now xoxo


Sunday, September 28, 2014

CONCEALER -101


con·ceal·er
kənˈsēlər/
noun
"a flesh-toned cosmetic used to cover facial blemishes and dark circles under the eyes". 

Concealer is absolutely essential for hiding under-eye discoloration and brightening and opening-up the face. If you have dark circles with undertones of purple, gray or red, the only way to even-out this skin and camouflage the discoloration is with the proper use of a make-up concealer.

CAN'T I JUST USE FOUNDATION? 
A concealer is a concentrated pigment that is NOT a foundation. Foundations have a less intense pigment ratio and are created to mimic your natural skin tone. Trust me, you want your concealer to be more concentrated with a higher  pigment ratio. It's heavier than foundation in an attempt to mask the discoloration and brighten the face. The under-eye area of the face (including the sides and underneath the nose) is what I call a "Light Zone"; it's the area on the face where the light should be concentrated, in an effort to create facial illumination and balance. A dark under-eye pigment (aka: "dark circles") can upstage the face and create unsightly imbalance.

Concealers come in various options: Creams, Liquids, Pens, Crayon Sticks and Pastes....


"liquid pen" concealer (assorted brands) and a "crayon stick" concealer by MAC

WHAT ABOUT MY FACIAL BLEMISHES & HYPER-PIGMENTATION? 
Although a concealer can do the trick at camouflaging these hot spots, I would recommend sticking to the under-eye area when using a concealer and invest in a quality "color corrector" for your facial hyper-pigmentation, such as Motives "Color Perfection Quad" or Laura Mercier "Secret Camoflauge".


"cream" concealer by MAC and "liquid" concealer by Covergirl

APPLYING CONCEALER ISN'T ROCKET SCIENCE, IS IT?
Rocket Science? No way! However, an application that will render the under eye skin impossibly luminous can be a bit tricky. The problem for most of us, is that the concealer tends to cake and settle into our under-eye cracks and fine lines, yielding unsuccessful results.

Before you attempt to create a flawless under-eye finish, you must first understand the under-eye SKIN itself. This is the thinnest, most vulnerable skin on the body and does not contain hair follicles. The absence of follicles results in drier skin (which ages quicker compared to other areas of the body). Under-the-eye skin is vulnerable because this area is void of sebaceous-gland-activity (oil production), as opposed to other parts of your face which have an abundance of natural oil production. For those that have under-eye discoloration or darkness, the only way to mask these deepened tones is with the use of a concealer. This darkening is due to the thin eye skin showcasing your underlying biology. In other words, the darkness seen as an "under eye circle" may actually be the shadow of your bone or sinus cavity, shodowing through the thin eye skin. This is particularly evident in those with allergies, where sinus fluid is present. Additionaly, darkening of the under-eye skin is typically hereditary, and no you cannot "get rid" of these dark circles. A product which claims to eradicate the circles is not being entirely truthful. It may contain light reflectors which give an illusion of light, but the discoloration will always be present on naked skin. 

SO WHAT DO I DO?
The first thing you need to think about is HYDRATION. Applying a hydrating eye cream prior to concealing the under eye is  absolutely necessary. However, don't just apply one layer. If you want this fine skin to plumpen and appear flawless when made-up, you need to apply SEVERAL layers of eye cream (waiting a few minutes in between layers), to truly hydrate the area. If you're in a hurry and need to head off to work, then one layer of cream is better than none. 

For a smooth, bright, crack-free finish, follow my fool-proof method. Yes, there are several steps. No, it's not practical for "everyday makeup" (unless you're obsessive like me). However, if you're getting ready for a special event or a photo shoot, this tip is a ESSENTIAL!

MY 10 STEPS TO FLAWLESS CONCEALER:
1. Cleanse, Tone and Moisturize the face and apply foundation to even-out skin tone. 
2. Apply a hydrating EYE CREAM (to the under eye area), and allow it to absorb into the skin. 
3. Apply another layer of eye cream, and allow it to absorb into the skin. 
4. Apply another layer of eye cream, and allow it to absorb into the skin. 
5. Keep repeating the eye cream application until the skin is rendered plump and hydrated (at least 3 times if not more).
6. Next, apply an eye PRIMER to the under eye area. It sounds unusual, I know! But the primer will allow the concealer to stay put without cracking and it will give it that flawless HD finish.
7. Apply a LIQUID concealer. 1-2 shades lighter than your skin. Cream concealers  are too heavy. The only exception in using a cream concealer is for those who have excessive and very dark under-eye discoloration. If this is the case, use a CREAM CONCEALER as it will effectively hide the discoloration, however, after the cream is applied, add a layer of LIQUID concealer on top. Trust me, it will brighten your face.
8. Apply a layer of LIQUID concealer, 1-2 shades lighter than your skin. Don't just apply the liquid under the eye, however. For a full-on brightening effect, dot the liquid concealer onto the sides of the nose (directly under the eyes) and around the nostrils as well,
9. Using your finger, a concealer brush or a blending sponge, lightly blend the product into your skin. You will immediately see how your face opens up and becomes illuminated. 
10.  LIGHTLY dust a translucent powder to the areas you've just applied the liquid concealer to. Do not use too much, a little is all you need to set the makeup into the skin. 

For daily beauty, skin -care and brow tips, follow me on social media
@Beauty and Brow Girl

--CIAO for now xoxo
Beauty and Brow Girl Website