Wednesday, November 26, 2014

COLD creams


     When I think of the benefits of what cold does to the skin, I flashback to the opening scene of Mommy Dearest where Faye Dunaway's character pulls out a big bowl of ice water from the mini fridge (conveniently stored in her bathroom), and drowns her face in the icy liquid.  As a child I used to witness my Middle Eastern aunts slather their faces with a thick white layer of the Ponds Cold Cream that they stored in the refrigerator. At the time I never understood why they didn't just reserve the fridge for produce, but the fact that they always looked at least 20 years younger than their age, tells me that they were onto something. 

    This notion of the skin benefiting from cold products has stuck with me all these years since watching that movie scene and my aunt's refrigerated cream, and now that I'm a skin care professional I understand why:
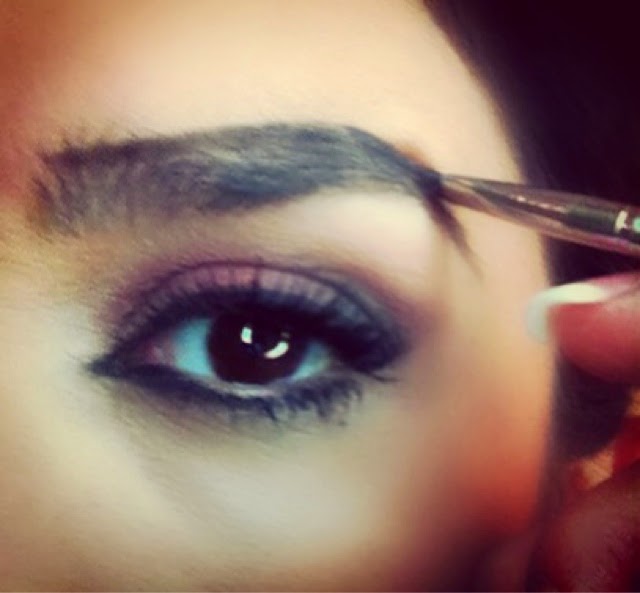
KEEP THE EYES COLD:
     If you've ever had a professional facial, you will know that the eyes are always kept cool, despite warmth and steam manipulation applied to the face. With regard to make-up, pigments work best when warmed by the body's heat (my favorite trick is to use a lighter to warm my kohl eyeliner prior to application, it glides on better and cools to a semi-permanent finish). However, when PREPPING the skin for make up application (particularly the eyes), applying something cold to the skin will reduce inflammation and give your skin a sense of vigor. Applying coolness to the face restricts the blood vessels and causes the skin (and pores) to tighten. Cold stimulates the nerves and energizes the skin which is pretty important on those early-morning wake-up calls. Objects (like an ice-pack), or products applied to puffy eyes, work in reducing inflammation in the same way that water eliminates a flame. The immediate shock from warm to cold allows fluid stored in the eye ducts to drain and de-puff. 

THE REFRIGERATOR IS A MUST-HAVE BEAUTY TOOL:
     A trick that I've been doing for years is to keep two kitchen spoons in my freezer and press them firmly onto my eyes for about 5 minutes. This trick is great when I need a quick fix to combat puffy morning eyes. Another weapon for inflammation around the eyes (thank you aunties) is to saturate green tea bags in water and freeze them. Resting the frozen tea bags on your eyelids as the green tea thaws onto the eye skin is an eye de-puffing marvel! Green tea has anti-inflammatory properties and soothes the skin, how fabulous is that!

     Beauty products can also benefit from your fridge. Facial serums, face creams and eye creams, for example, have a shelf life and should be kept in cool, dark environments. Notice the container that your cream or serum comes in. If the bottle or jar is amber in color or if you cannot see the product through the bottle, it usually means that it's photo sensitive, such as products containing vitamin C. Keeping serums and creams in the fridge serve multiple functions: it preserves the shelf life of the product, it ensures that the chemical composition of your products are not altered by heat and humidity, and it adds the benefit of coolness to the skin and eyes. 

COLD HAIR
     Rinsing the hair with cold water after a hot shower will seal the hair cuticle, this helps hair with the shine factor. Have you ever noticed how hair is shinier in frigid cold weather? It's for this reason that I like to keep my silicone based hair serums and keratin creams in the refrigerator. When applied to dry hair, these chilled hair products will give you a that uber shine factor.

MORE BENEFITS OF COLD
     Exposure to cold will stimulate the Nervous System and increase the level of Beta-Endorphins and Noradrenaline in the blood. Beta-Endorphins are the neurotransmitters responsible for making us feel happy and invigorated; their function is similar to adrenaline whereby constricting the blood vessels and normalizing breathing during stressful situations. Noradrenaline deficiency can lead to fatigue, lethargy and a feeling of overall tiredness, so stay cold for more happy!

ATTENTION MEN                         
Can cold increase a man's testosterone levels? Indeed it can (whooo hoooo!). One way is to apply cold compresses to the gonads twice a day, but an easier way is to take a 10 minute cold shower upon waking-up in the morning and then before bed. The cold water will not only boost a man’s libido, but his overall strength; his energy levels will increase as well. A man's gonads physically change as a direct result of temperature. When it's hot, they hang lower in order to escape the heat in an effort to cool down; when it's cold, the sack rises. Heat is a real testosterone killer, so before you warm up the sheets, cool down in the shower first. So, what does a man's testosterone level have to do with the theme of "female beauty" in this article, you may ask? Simply put, a woman's healthy, rosy, gorgeous glow will benefit immensely and can be a direct result of her partner's testosterone levels. So, keep your man cold (below the belt) whenever possible ;)
--CIAO for now xo

For DAILY beauty tips, follow me on Instagram, Facebook and Tumbler: @Beauty and Brow Girl
.....Twitter: @BeautynBrowGirl

Saturday, October 4, 2014

Fill-in those BROWS! 101


The eyebrows are the quintessential pillars of the face, framing the features like nothing else can. They balance the face, adding impact, strength, symmetry and intense visual interest, while creating a bit of mystery. Even the fullest of brows require help with sparse gaps which create imbalance. Whether using a brow pencil, a pigment cream, a pigment gel or a pigment powder (my preferred method and the method used below), the same rules apply: use a light touch when applying, and blend blend blend to achieve a soft yet bold finish.

BROW ANATOMY: The eyebrows are comprised of four quadrants. The hairs of the top line of the brows grow downward. The bottom brow-line hairs grow up. If you brush the brows down, exposing the top line of the eyebrow, notice the portion from the head to the top of the arch (quadrant "q" 1), and the line from top of arch to the upper tip of the tail ("q 2"). Now brush the brow hairs upward. Start at the underside of the head to the underside of the curve to identify "q 3", then continue the line from underside of arch to underside of tail ("q 4"). When you identify the four quadrants and trace those lines with pigment (regardless of how sparse and thin your brows are), you've just identified your brow's unique anatomy by creating a blueprint.

Invest in a quality eyebrow brush and practice shading your brows-in everyday. A shaded brow adds life to the face, so take the time to learn how to fill yours in. 

STEP 1: Brush the hairs upward


STEP 2: Tweeze away any stray hairs (never wax the brows).


STEP 3: Apply a brow pigment (with an eyebrow brush) to Quadrant-1 and follow the top line from HEAD to ARCH. If using a brow powder, I recommend wetting the brush first with a bit of water, then dip your damp brush into the powder pigment.


STEP 4: Follow the top brow line from Quadrant-2, from ARCH to TAIL. 


STEP 5: Now outline and follow the under-side line of Quadrant-3, from under-side of head to the under side of the arch. 


STEP 6: Continue that bottom brow-line from the under-arch to the under side of the tail (Quadrant-4). 


STEP 7: Using a spoolie, brush your brows to blend-in the pigment. Brush in the opposite direction of the hair growth to really blend the pigment into the underlying skin.


STEP 8: After the pigment is well blended, fine tune the sparse areas that may need a bit more pigmentation.


STEP 9: Applying a creamy concealer to the perimeter of the eyebrows will hide any discoloration and hyper-pigmentation around the eyebrows, making them really stand-out. Then blend the concealer well with a concealer brush.


STEP 10: Brush on a sheer layer of light eye shadow onto the brow bone. The shadow will finish the look and really set the brows off making them the star of the face show!


For daily beauty, skin-care and BROW tips, follow me on Instagram, Facebook and Tumbler 
@Beauty and Brow Girl  or on Twitter @Beauty n Brow Girl
Direct links from my website at www.BeautyandBrowLounge.com

--CIAO for now xoxo


Sunday, September 28, 2014

CONCEALER -101


con·ceal·er
kənˈsēlər/
noun
"a flesh-toned cosmetic used to cover facial blemishes and dark circles under the eyes". 

Concealer is absolutely essential for hiding under-eye discoloration and brightening and opening-up the face. If you have dark circles with undertones of purple, gray or red, the only way to even-out this skin and camouflage the discoloration is with the proper use of a make-up concealer.

CAN'T I JUST USE FOUNDATION? 
A concealer is a concentrated pigment that is NOT a foundation. Foundations have a less intense pigment ratio and are created to mimic your natural skin tone. Trust me, you want your concealer to be more concentrated with a higher  pigment ratio. It's heavier than foundation in an attempt to mask the discoloration and brighten the face. The under-eye area of the face (including the sides and underneath the nose) is what I call a "Light Zone"; it's the area on the face where the light should be concentrated, in an effort to create facial illumination and balance. A dark under-eye pigment (aka: "dark circles") can upstage the face and create unsightly imbalance.

Concealers come in various options: Creams, Liquids, Pens, Crayon Sticks and Pastes....


"liquid pen" concealer (assorted brands) and a "crayon stick" concealer by MAC

WHAT ABOUT MY FACIAL BLEMISHES & HYPER-PIGMENTATION? 
Although a concealer can do the trick at camouflaging these hot spots, I would recommend sticking to the under-eye area when using a concealer and invest in a quality "color corrector" for your facial hyper-pigmentation, such as Motives "Color Perfection Quad" or Laura Mercier "Secret Camoflauge".


"cream" concealer by MAC and "liquid" concealer by Covergirl

APPLYING CONCEALER ISN'T ROCKET SCIENCE, IS IT?
Rocket Science? No way! However, an application that will render the under eye skin impossibly luminous can be a bit tricky. The problem for most of us, is that the concealer tends to cake and settle into our under-eye cracks and fine lines, yielding unsuccessful results.

Before you attempt to create a flawless under-eye finish, you must first understand the under-eye SKIN itself. This is the thinnest, most vulnerable skin on the body and does not contain hair follicles. The absence of follicles results in drier skin (which ages quicker compared to other areas of the body). Under-the-eye skin is vulnerable because this area is void of sebaceous-gland-activity (oil production), as opposed to other parts of your face which have an abundance of natural oil production. For those that have under-eye discoloration or darkness, the only way to mask these deepened tones is with the use of a concealer. This darkening is due to the thin eye skin showcasing your underlying biology. In other words, the darkness seen as an "under eye circle" may actually be the shadow of your bone or sinus cavity, shodowing through the thin eye skin. This is particularly evident in those with allergies, where sinus fluid is present. Additionaly, darkening of the under-eye skin is typically hereditary, and no you cannot "get rid" of these dark circles. A product which claims to eradicate the circles is not being entirely truthful. It may contain light reflectors which give an illusion of light, but the discoloration will always be present on naked skin. 

SO WHAT DO I DO?
The first thing you need to think about is HYDRATION. Applying a hydrating eye cream prior to concealing the under eye is  absolutely necessary. However, don't just apply one layer. If you want this fine skin to plumpen and appear flawless when made-up, you need to apply SEVERAL layers of eye cream (waiting a few minutes in between layers), to truly hydrate the area. If you're in a hurry and need to head off to work, then one layer of cream is better than none. 

For a smooth, bright, crack-free finish, follow my fool-proof method. Yes, there are several steps. No, it's not practical for "everyday makeup" (unless you're obsessive like me). However, if you're getting ready for a special event or a photo shoot, this tip is a ESSENTIAL!

MY 10 STEPS TO FLAWLESS CONCEALER:
1. Cleanse, Tone and Moisturize the face and apply foundation to even-out skin tone. 
2. Apply a hydrating EYE CREAM (to the under eye area), and allow it to absorb into the skin. 
3. Apply another layer of eye cream, and allow it to absorb into the skin. 
4. Apply another layer of eye cream, and allow it to absorb into the skin. 
5. Keep repeating the eye cream application until the skin is rendered plump and hydrated (at least 3 times if not more).
6. Next, apply an eye PRIMER to the under eye area. It sounds unusual, I know! But the primer will allow the concealer to stay put without cracking and it will give it that flawless HD finish.
7. Apply a LIQUID concealer. 1-2 shades lighter than your skin. Cream concealers  are too heavy. The only exception in using a cream concealer is for those who have excessive and very dark under-eye discoloration. If this is the case, use a CREAM CONCEALER as it will effectively hide the discoloration, however, after the cream is applied, add a layer of LIQUID concealer on top. Trust me, it will brighten your face.
8. Apply a layer of LIQUID concealer, 1-2 shades lighter than your skin. Don't just apply the liquid under the eye, however. For a full-on brightening effect, dot the liquid concealer onto the sides of the nose (directly under the eyes) and around the nostrils as well,
9. Using your finger, a concealer brush or a blending sponge, lightly blend the product into your skin. You will immediately see how your face opens up and becomes illuminated. 
10.  LIGHTLY dust a translucent powder to the areas you've just applied the liquid concealer to. Do not use too much, a little is all you need to set the makeup into the skin. 

For daily beauty, skin -care and brow tips, follow me on social media
@Beauty and Brow Girl

--CIAO for now xoxo
Beauty and Brow Girl Website

Friday, September 5, 2014

I'm the BEST at What I Do Best


i don't need to show you a photo to emphasize the impact a brow has to a face. However, this photo speaks for itself. I see new clients EVERY DAY w butchered brows. Why? Because the value they assign for shaping has given them a brow worthy of the little money they invested. YOU GET WHAT YOU PAY FOR. Pay $10 for a brow-shaping & you'll be paying for the consequences in more than cash, as brows may never grow back to their full potential in many cases. What's the difference between me & the troglodytes who have no understanding about brow anatomy? (because their education came from "beauty school" rather than their innate ability or passion). The difference is in the well-defined area between "expert" & "waxer". Brow Anatomy, the Architecture of the Brow, Understanding the Brow Line, Understanding the Juxtaposition of an Eyebrow to the Face, Understanding Hair-Growth Patterns, Color Theory, Understanding the Biological Hair-Growth Cycle, Having knowledge of the affects that Hormones play with regard to hair...... All this & MUCH MORE should be mastered by ANY ONE who is privileged enough to touch your face. Trust me, I make more of a profit performing a $600 permanent eyebrow procedure than a $40 brow-shaping service. HOWEVER, brows are my passion, the beauty inspiration that drives me, so with that said, I would do it for free....but I have to pay my rent, that's why I charge. So when I REFUSE your tip (because it offends me & because a beauty-business owner should NEVER accept a tip from her client), it's because I'm giving you my 
tens-of-thousands of hours of training, of passion, of ability, of scientific knowledge & of innate understanding. Am I being arrogant? You bet your brows I'm arrogant, but it's because I know I'm great at what I do & I don't do it for money. THAT'S the difference between me & the troglodytes. Contact me for a friendly, no-tip-required consultation. CIAO for now xoxo 

Thursday, August 28, 2014

ELECTROLYSIS Post Treatment Protocol


Electrolysis is the process of permanent hair removal. In fact, it is the only form of permanent hair removal approved by the FDA. The treatments use various energy modalities such as Thermolysis, Galvanic or Blend (I use Thermolysis in my practice; 2014 Fischer TS-1 machine), and can only be performed by a certified, State-licensed Electrologist. The practice of Electrology is supervised by the Board of Medicine, which was legislatively established to ensure that every Electrologist (and Electrology facility) meets minimum requirements for safe practice. When inspecting an Electrology facility, I suggest that you make sure the Practioner exercises MAXIMUM requirements for safe practice, as this is a semi-invasive procedure and should be practiced in a semi-sterile environment. Universal precautions should be exercised at all times.

After Electrolysis treatment, your skin may be slightly red and/or swollen..you may even develop some bruising. This is completely normal and will lessen within a few hours but may even last a few days (bruising can last up to two weeks). It is also not unusual for redness and swelling to appear the day AFTER treatment. A slight crust may develop over the treated area, again, this is normal. The crust is a good sign, it's your body's natural process for sealing the follicle in an effort for healing to occur. If a crust develops, let the skin heal and do not pick at it, as picking may cause the area to pit or scar (allow the area to shed on its own). During treatment, the hair was removed with a current of energy, traumatizing the dermal papilla, rendering the hair follicle exposed to elements and bacteria. The best thing that you can do is to keep the area clean, avoid touching it and avoid applying harsh products on it for 24 hours. If you follow my 10 steps for successful post-treatment healing, you'll be fuzz-free with beautiful glowing skin in no time. 

1. Keep the area clean with alcohol, witch hazel, hydrogen peroxide or soap and water and pat the area dry with a tissue or cotton. Do not use a towel, as even a laundered towel may harbor bacteria. 

2. Keep the area moist by applying a thin layer of "Bacitracin" ointment, for the first 48 hours. Bacitracin works by stopping the growth of certain bacteria. You can purchase this ointment at your local drugstore. After 48 hours, continue to keep the treated area hydrated with "Aquafor" (found at your local drugstore as well).
3. If inflammation occurs as evidenced by swollen bumps on the skin, apply a cold compress to the treated area for 10 minutes, then remove for 10 minutes. Do this a few times, then apply your anti-bacterial ointment. 

4. Do not touch or disturb  the treated area, unless you've sanitized your fingers with alcohol first. Bacteria harbors on the fingertips and can create an infection on the treated area. Remember, an exposed follicle is a vulnerable one. 

5. Do not exfoliate the  treated area for 48 hours.

6. It is common to develop ingrown hairs in areas that have been treated for a period of time. If an ingrown hair develops, gently exfoliate the area 48-72 hours after treatment. 

7. Avoid direct sun on the treated area for 48 hours (including tanning beds). Sun exposure to the treated area may cause post inflammatory hyper-pigmentation, so stay out of the sun and wear a hat.   Sun exposure can cause damage to the skin, post-treatment, so after 48 hours apply sunscreen to the treated area. Remember, the simple task of walking across the street or driving in your car will expose the skin to direct sun light. I recommend using a broad spectrum, Paraben-free sunscreen with a minimum SPF of 30. I love "Tizo" brand. It comes in a tinted and non-tinted version, and is very soothing to the skin. 

8. Keep the treated area as clean & clear as possible (with the exception of an occlusive ointment) for the first 24 hours. Therefore, minimize the use of make-up & do not encourage sweat via exercise.

9.  Do not drink alcohol within 24 hours of treatment. Alcohol thins the blood which can interrupt the healing process. 

10. Avoid shaving the treated area for 24 hours after treatment. 

For weekly beauty and skin-care tips, follow my beauty pages @Beauty and Brow Girl

--CIAO for now  xo


Sunday, August 24, 2014

Melasma


WHAT IS MELASMA?
Melasma is a very common skin condition which affects millions of people in the US, primarily women because it's hormone related. It causes brown to gray-brown patches or splotches on the face, neck and forearms, and can be very unsightly and difficult to camouflage with make-up (an orange-based corrector cream works best. You can even try blending-in orange pigment, like orange lipstick or an orangy concealer. Blend the makeup into the skin, then brighten the skin up with foundation or a non-orange concealer that is 2 shades lighter than your skin tone. The goal is to temporarily "erase" the pigmentation on an effort to camouflage the staining).

Also referred to as "pregnancy mask", since it affects many women during pregnancy (a hormone frenzy), what exactly causes Melasma in the first place is a bit of an enigma. Aside from pregnancy, it can be induced by the use of hormone therapy, birth control pills, anti-seizure medication and SUN EXPOSURE.

If you have or think you have Melasma, consult with a board certified Dermatologist, however, your first line of defense should be a "broad spectrum" sun screen (minimum 30) applied to the face EVERY DAY. Broad spectrum protects your skin against UVA and UVB rays; my favorite sunscreens are the "physical" versions which contain Zinc or Titanium Dioxide. Sun protection needs to be perpetual skin maintenance. It's not only about the UVA/UVB rays either. The sun's infra-red rays (which by the way penetrate glass) feeds Melasma, aggravating and worsening the situation. Yes, Melasma gets worse with heat, that's why I never recommend laser therapy to treat it, as lasers produce heat energy.  This is called "heat induced pigmentation" and can affect skin even whilst wearing a hat. Hats protect the face from sun exposure, but the heat generated from the hat itself and from the sun's radiation can deepen the pigmentation, yikes! So what does one need to do, live in a cave?

TREATMENT:
Many at-home and over-the-counter treatments (such as acid exfoliators and OTC lightening creams) may aggravate  the situation and darken the pigmentation over time, so if you have a Melasma it's important to address the situation with your  Dermatologist first. Your doctor may prescribe a protocol using both lightening creams (containing 4% Hydroquinone) as well as a series of controlled chemical peels. There is an amazing over the counter oral supplement called "Helioplex" which is botanical based (it is derived from the fern plant) and protects the skin against the effects of the sun. It is IMPORTANT to note that if you take Helioplex, it is NOT a substitute for sunscreen. However, if you are prone to Melasma (and sun burn) and spend a lot of time in the sun, this OTC supplement is a terrific  "added" protection protocol that I highly recommend. 

BEST LASER FOR MELASMA:
Laser energy is hot, and a laser with too much heat can actually intensify the pigment. The same theory applies to the radiation one gets through glass (from the sun), as well as heat exposure in general. So a cool laser can be used in conjunction with the other aforementioned treatments. 

"Clear & Brilliant Laser" is a mini fractional laser which is a cool laser and works well because on Melasma because it's not as hot as other lasers, but is incredibly efficient at treating pigmentation issues. Although you may require several treatments due to it's conservative level of energy, some  patients see major results after only one treatment. 

For more information about Melasma or the Clear & Brilliant laser, contact your board certified Dermatologist. 

For daily skin-care and beauty tips, follow me, @Beauty and Brow Girl 
IG, FB, Twitter, Periscope & Tumbler

-CIAO for now  xo

Wednesday, July 23, 2014

Sparse Eyebrows

SPARSE BROWS affect the majority of women. Even those with fuller, thicker brows have to contend with sparse areas. The fix is easy and there are several options: the quickest fix is to shade those sparse areas in with pigment. Whether using an eyebrow shadow, a brow pencil,  a tinted wax or a mousse, you have plenty of options. 

Brow-growth serums like "Revitabrow" work well, but need to be used consistently. What serum do I personally use? I condition my brows daily with my own natural, non-chemical cocktail of various oils, including Castor (yes, it works). Another option which works amazingly well is "Latisse", available by prescription. 

Lastly, for those with little to no brows, you may want to consider Permanent Make-up to render your brows permanently shaded. Message me with questions regarding your sparse brows. There's a fix, I promise you!